Simon Frankau's blog
My first attempt at 3d printing
I do not have a 3d printer. What I did was submit some files to a 3d printing service, and get the results back.
It all started with wanting to tidy up my study. I found an unfinished "Revell Attack Fortress SDF I" Japanese robot model kit from the late '80s or early '90s. Clearly the way to tidy this up is to finish constructing it. Unfortunately, it was missing one piece. What to do? Also clearly I needed to use 3d printing to reconstruct the missing piece and finish the model.
As documented on Mastodon, my first attempts to reconstruct the model were with photogrammetry via Meshroom. This was incredibly cool tech. and very fun to use, but the result was something that looked really good when textured that was a blobby mess geometrically. Plan B was to measure the thing carefully and mock it up in OpenSCAD. This worked a lot better, even if OpenSCAD is inexplicably slow to "render" the constructive solid geometry models.
Around the same time, I was trying to put my old Z80-based CP/M-running SBC in a case. I'm pretty consistently rubbish with these projects, the end result looking hideously bodged, but I thought... maybe I can do better with the front panel this time? If I can 3d print the mounts for the various connectors etc., it might look ok for once. So, that's what I set about doing, again in OpenSCAD.
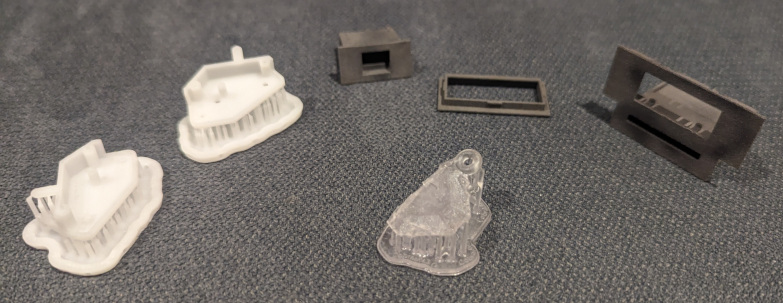
All this came in just under teh minimum order size for the company I was looking at using, so I rounded out the order with a model of the Cobra Mk III (from Elite) as a keyring fob, mostly as an excuse to exercise a different material.
I used SGD 3D, with SLA for the model parts and keychain ("Rigid Resin 4000" and "Flexible Resin" respectively), and SLS ("Nylon PA12 GF") for the front-panel components. I was really interested to try something other than the FDM printing with PLA we have at work, that I wouldn't trust for this level of detail.
Three weeks later, they shipped me my printed parts.
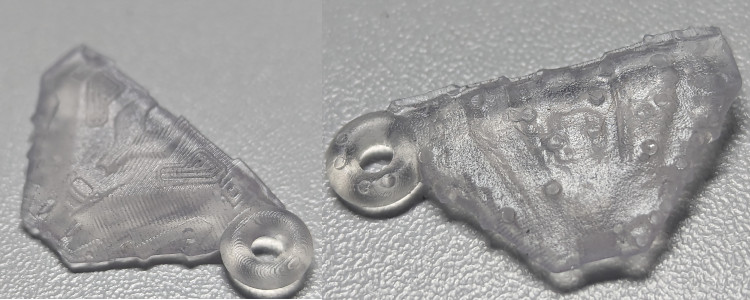
The SLA parts have support structures, so it was time to get clipping. I started with the flexible resin key fob. Yep, it's pretty flexible, and transparent. For the right applications it'd be pretty cool.
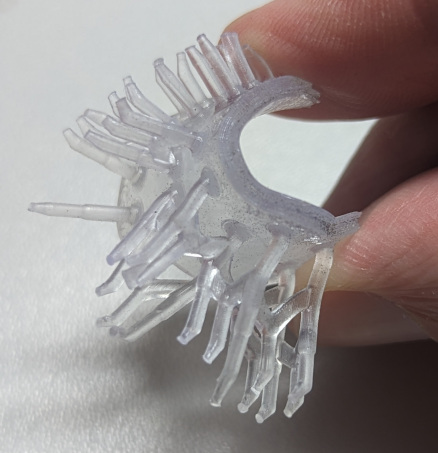
On the upper side there's a lot of detail visible - the resin printer approach works really well for that. On the other side, the detail is rather marred by those supports.
Moving on to the model pieces, I got further practice at clipping supports. This material is pretty brittle. Fine for detailed models, but not so good for mechanical things. The technology is capable of really fine detail, so it's a bit frustrating that they printed it the other way up to my request and at an angle, so that the surface that should have been flat was covered with bumps from the support points and banded from the lack of plane alignment. A couple of the holes, that I believe were close to but not below minimum size needed a bit of manual poking.
I bodged on a couple of coats of paint (to do this correctly you should be using more layers of thinned paint, but I'm very lazy), which actually seemed to emphasise the flaws in the printing, but the difference is minimal at any distance, even if you can spot it close-up.
Have a picture of the finished model. Yes, a 12-year-old could do better. I don't have the patience or skills of a good 12-year-old. :p Still, It's Done.

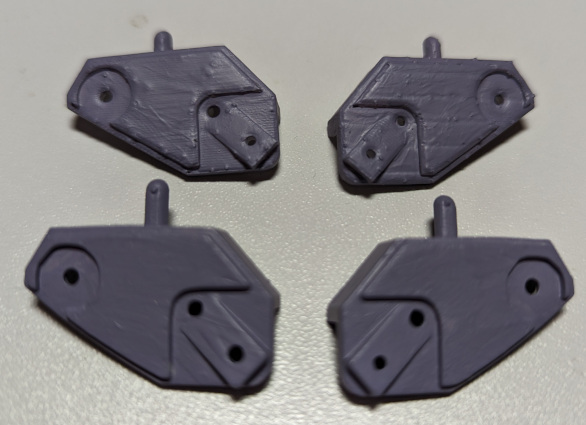
The SLS'd nylon, on the other hand, was pretty much exactly what I wanted. No supports, no obvious artefacts (although I think one of the faces was just on the edge of warping), and a firm yet flexible material that is useful for more than just pure aesthetics. The OpenSCAD designs fitted the breakout boards nicely. I think it's a process I'd want to use again, although I'm not sure whether to go with MJF (multi-jet fusion) or SLS again next time.

Posted 2023-10-08.